Cart is empty
Barrel Press Kit Instructions
|
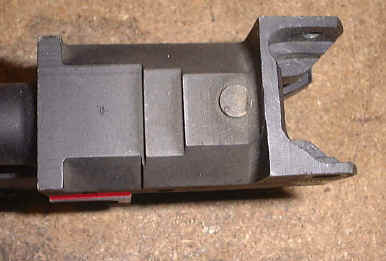
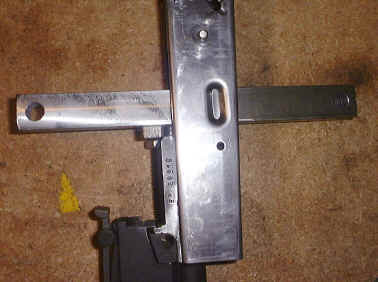
The aluminum plate provided with the press kit is for supporting the trunion while press in/out the barrel pin. If your receiver has been removed then you will want to use the set screws to make up for the thickness of the missing receiver. The picture to the left shows the amount of material missing (which is the thickness of the receiver). If you still have the receiver on your front trunion then you don't need to mess with the set screws. |
|
|
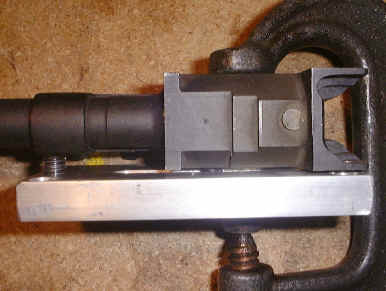
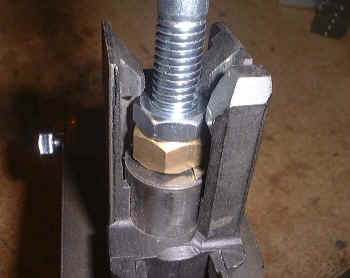
Here you can see the front set screw plus the middle and rear set screws leveling out the trunion on the aluminum plate. The cut-outs in the plate let you use this method with or without rivets installed. The hole that goes through the aluminum plate needs to be lined up with the barrel pin. The rear and lower edges of the trunion will line up with the bottom and right side of the aluminum block. The block was made so you can press the pin in/out from either direction. I try to look at the pin to see which direction it went in and press it back out from the other side.
|
|
|
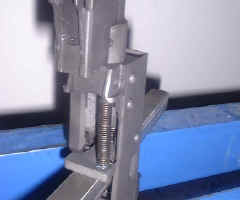
Don't clamp the parts together until you put them in the shop press. The two bars can be use to support the aluminum block, but make sure there is an opening for the pin to go through. Use a bar clamp or a c-clamp to clamp everything down to the two bars or press plates. This way you can move the setup around to center up the pin with the ram. |
|
|
|
|
|
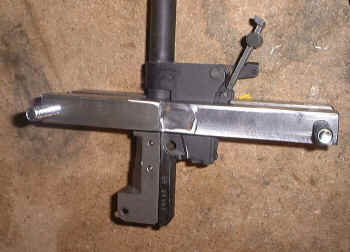
This picture actually shows installing the pin, but the setup is basically the same. To press the pin out slide the ram extension over the ram of the shop press. Use the set screw to keep it in place. Using the short punch press the pin out until just before the ram bottoms out on the trunion. Remove the short punch and replace it with the longer punch. If the punches are loose use a dab of grease on the ends to hold them in place. If they are tight use a pair of pliers to remove them. |
|
|
For pressing out the barrel there are two bars with holes drilled through them. One of the bars is machined to clear the rails in the receiver for pressing the barrel back in. Make sure the machined side of the bars face outwards from the barrel. There is no need to tighten the bars. The bolts are only there to keep the pieces from twisting. This is from an experience with a Yugo barrel and to me it's worth the extra work to make this a safer process.
|
|
|
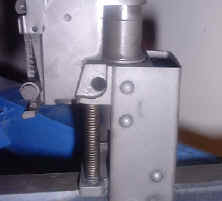
You will need to flip your rear sight forwards to clear the bars. If you don't have press plates or extra metal to lay across your shop press to support the bars so they run horizontally across the base of the shop press you can angle the bars across the base. If you have to angle the bars across the base be careful not to let the sight to hit anything. Once the trunion is supported on the two bars take the bolt with the brass nut on the end and set it inside the trunion on the barrel face. The jam nut was also needed after an experience with a Yugo barrel. There is a step on the brass nut that needs to match up with the extractor notch on the barrel. Once it's all lined up just start pressing it out with your shop press.
|
|
|
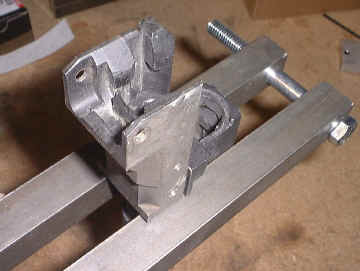
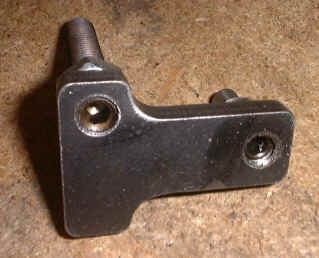
The "T" shaped piece is designed to hit the trunion in three spots. The left side of the "T" hits the rear left portion of the trunion. The short set screw fits into the magazine notch and the long set screw hits on the front area. The set screws are not adjusted when these are shipped out. You will want to level the "T" out with the left part on the rear of the trunion as a reference point. Then screw in the set screw in the mag notch. Once that is square adjust the long set screw. Use the jam nuts to lock the set screws in place.
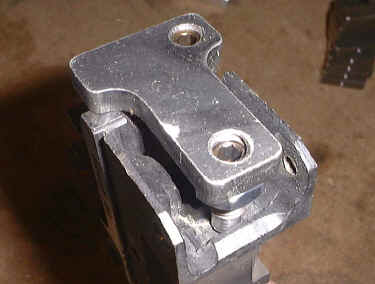
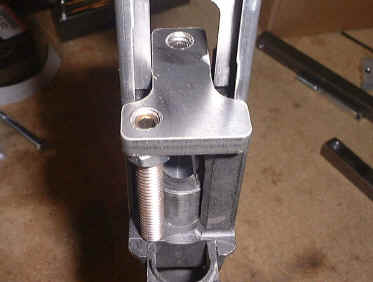
Once the "T" block is adjusted it will be placed inside of the receiver/trunion. Slide the machined bar into the receiver after the "T" block is installed. This is then placed in the shop press with the barrel facing up towards the ram of the press. Support the bar on your press plates or pieces of scrap steel if you don't have the press plates. To align the barrel for installation just use a straight edge and lay it across the rear sight tower and match it up for the opening in the trunion. Be absolutely sure that the barrel is going into the trunion perfectly straight. Once you get it started just press it in far enough for the notch in the barrel to align with the hole through the trunion.
Once the barrel is in place all that's left is to press the pin back into the trunion/barrel assembly. Use the short punch to install the pin.
|
|
|
|
|