Cart is empty
Flat Bending Jig Instructions
Here are the step-by-step pictures of bending a flat as well as putting the step in the top rail.
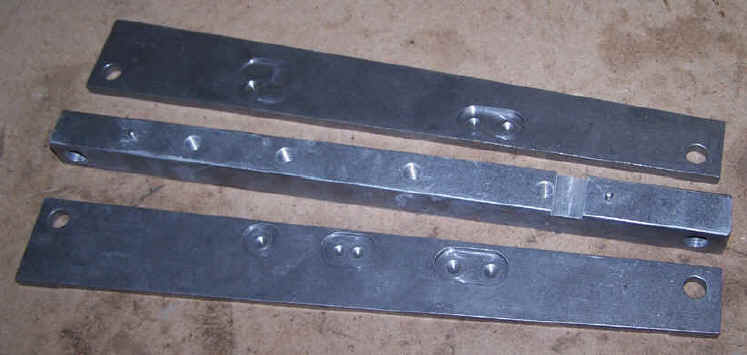
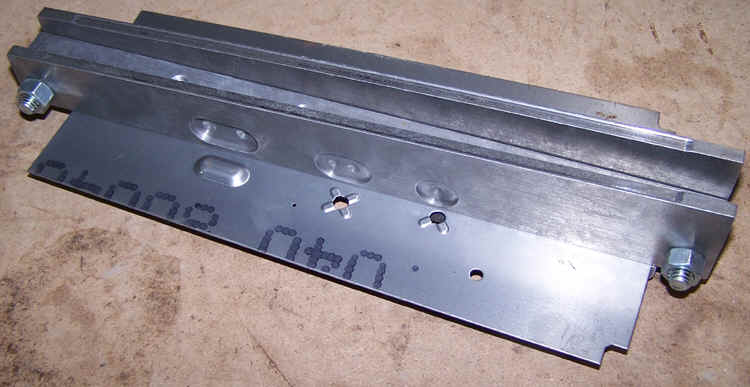
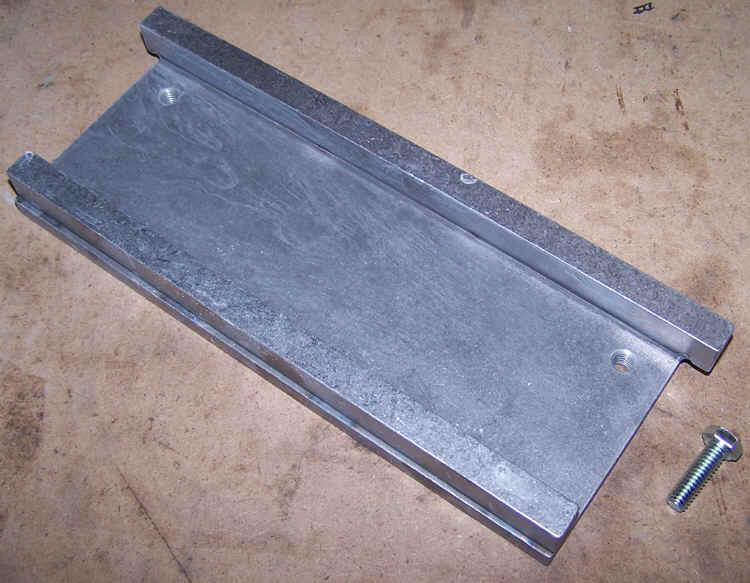
Start off by getting the three main pieces of the jig in the correct orientation with the smaller angled ends on the same end as the cut out in the center bar.
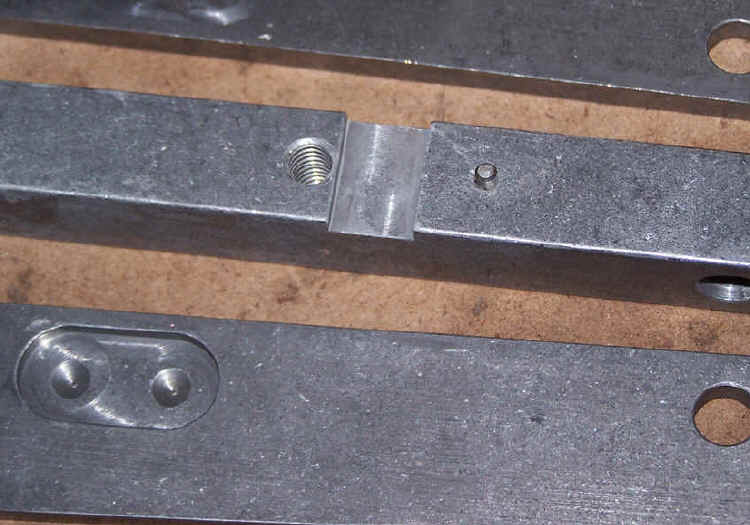
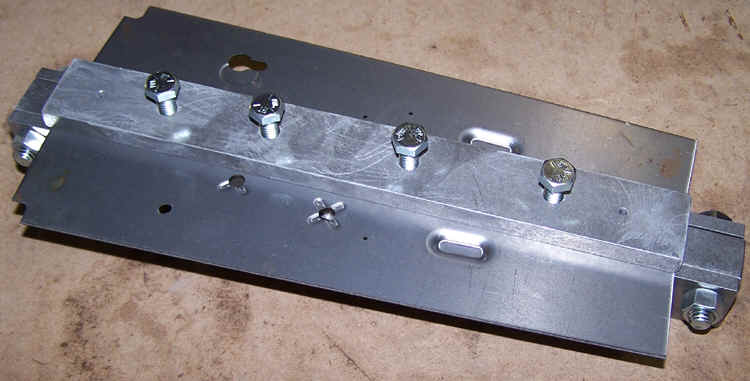
Set the angle plates on the center bar, but don't tighten the 3/8 bolts yet. Use a 9/16 wrench to tighten the nuts on the 3/8 bolts.
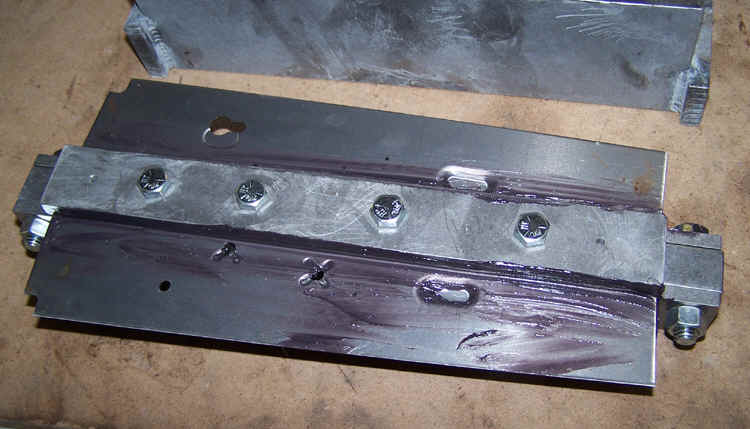
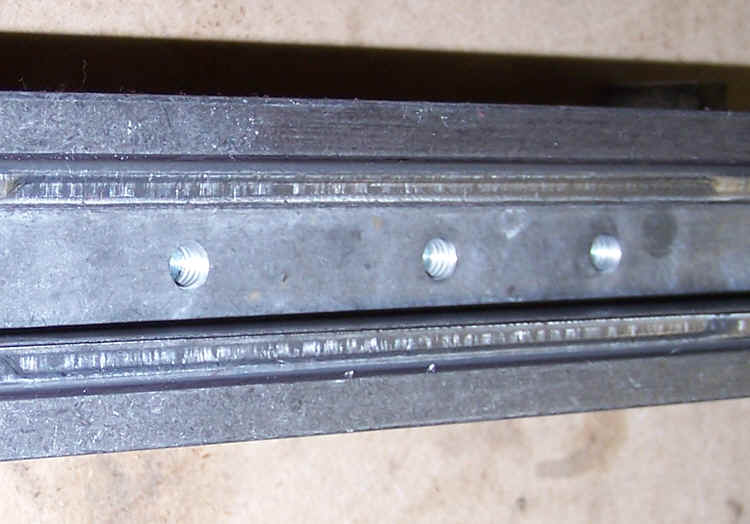
Place the flat on the center bar using the alignment pins. Just tap the flat down over the pins. Place the lower plate on and bolt them down with light torque. This is done with a 1/2" wrench. Tightening these first will square up the bottom of the angle plates with the flat. Now tighten the 3/8" bolts then go back over the 5/16" bolts for the last time. You don't have to tighten the lower plate 5/16" bolts exceedingly tight since they will just hold the flat in place. The bottom bend is made tight when the top rail step is being made.
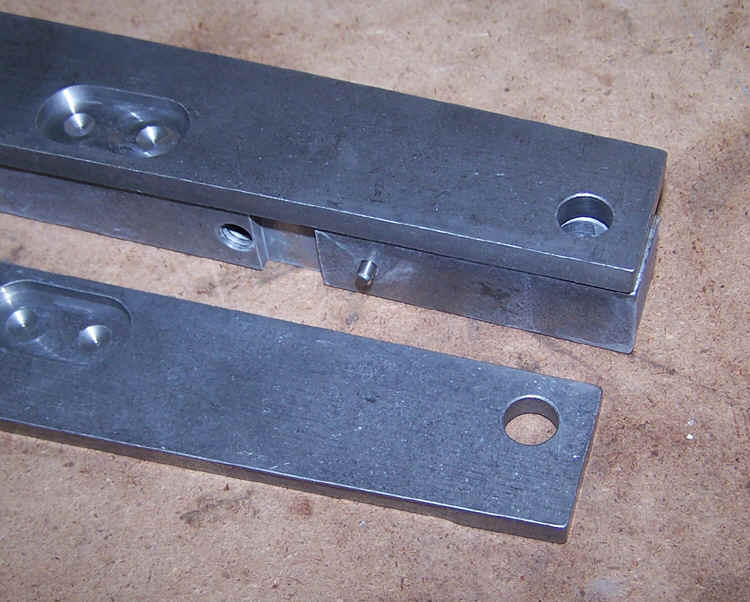
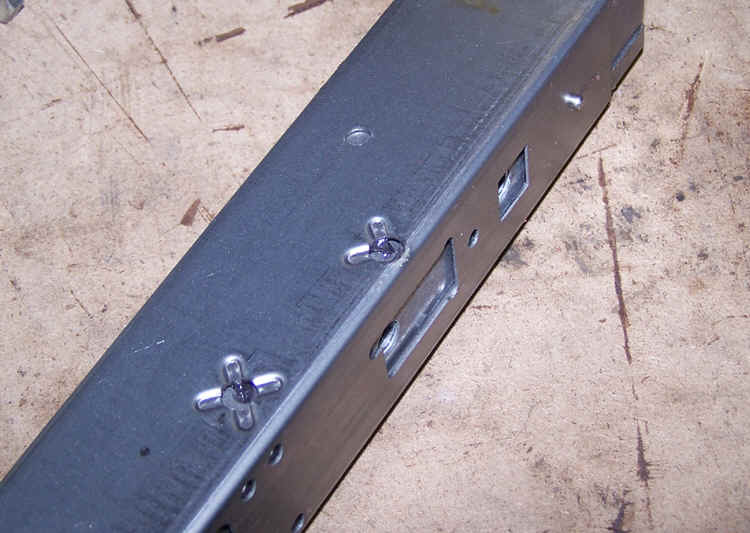
These are the new pieces for putting the step in the top rail as well as making a better bend on the bottom of the receiver. If you already have the jig and are looking at the step upgrade then you will get these pieces as well as the new angle plates.
The two angled pieces below go inside the jig base to support the center die of the jig while putting the step in the top rail.
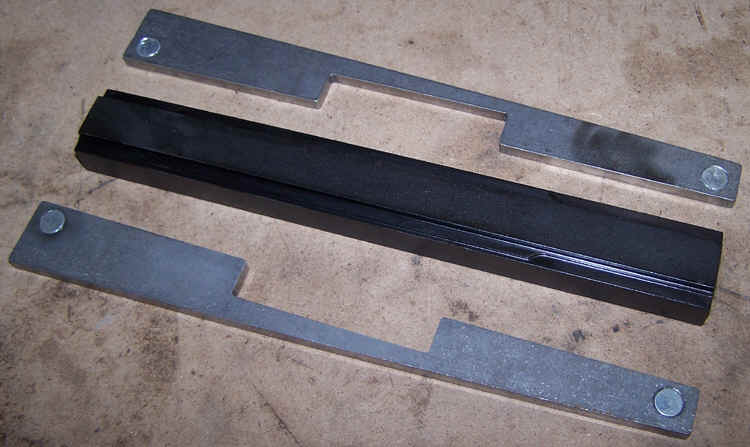
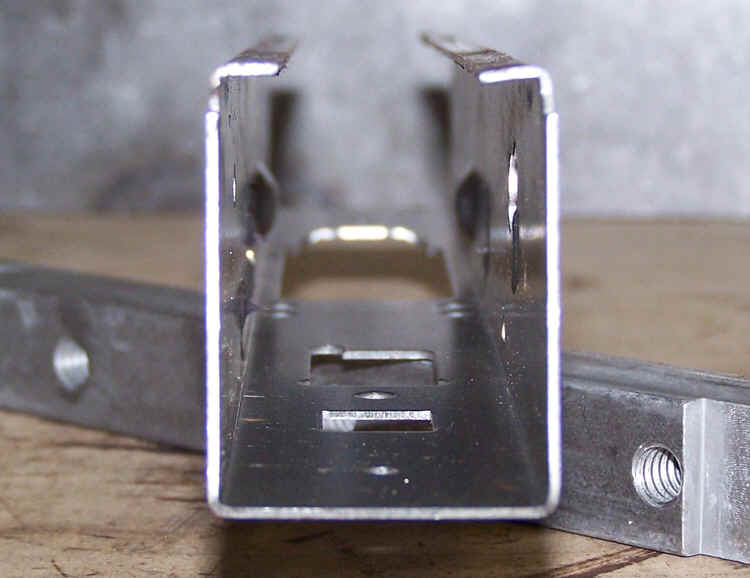
The angled supports go in the jig before bending the flat. The short end of the support goes towards the short end of the jig base.

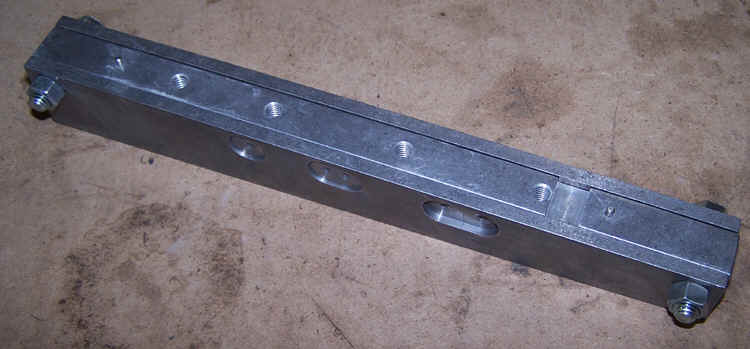
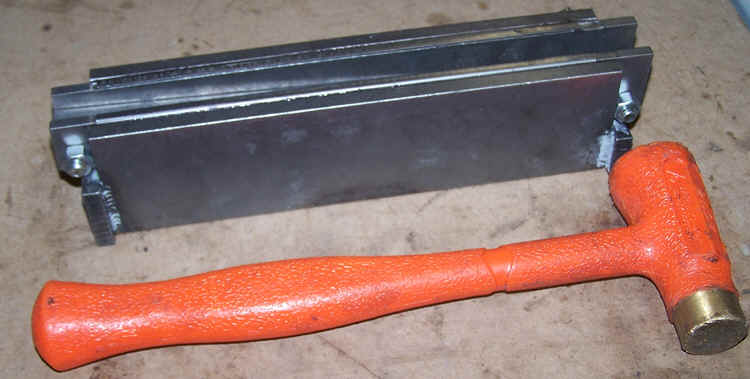
Here is the latest top rail bending jig. It's different than the one in my old instructions. The bolt is just in case the jig gets stuck together... just put the bolt in and press it out. Otherwise a dead blow hammer can be used to just knock it off.
Grease up the flat before bending it in the jig. The grease I used was some that I use for my CNC machining centers. Any high pressure grease should be fine.
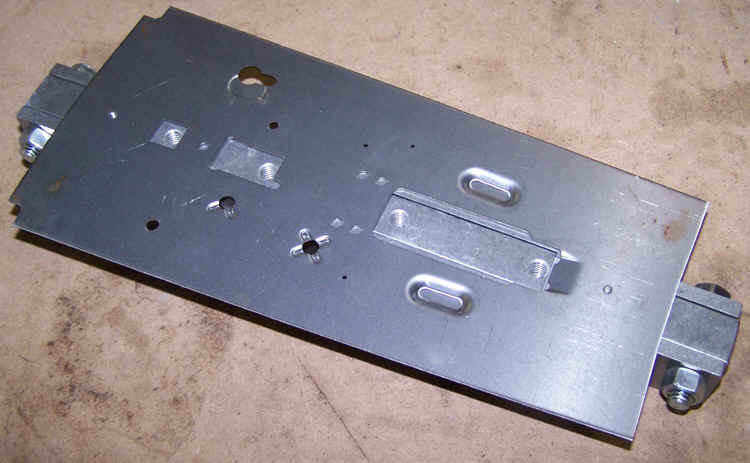
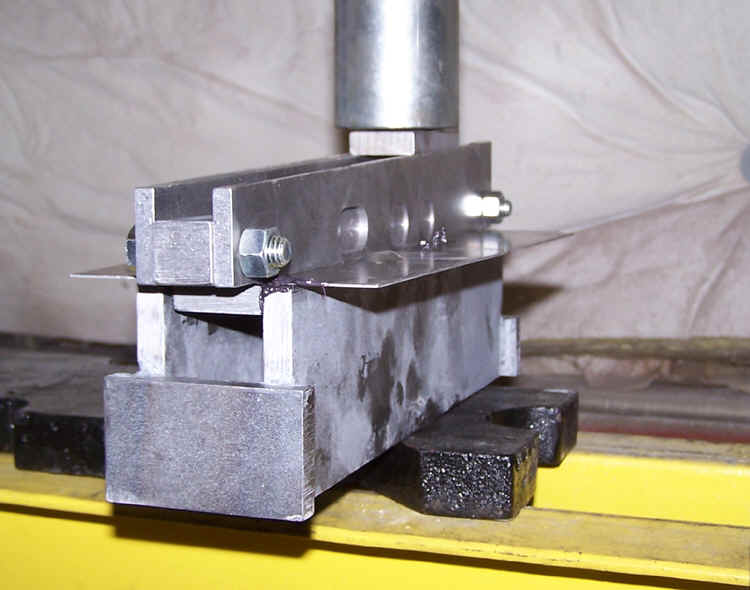
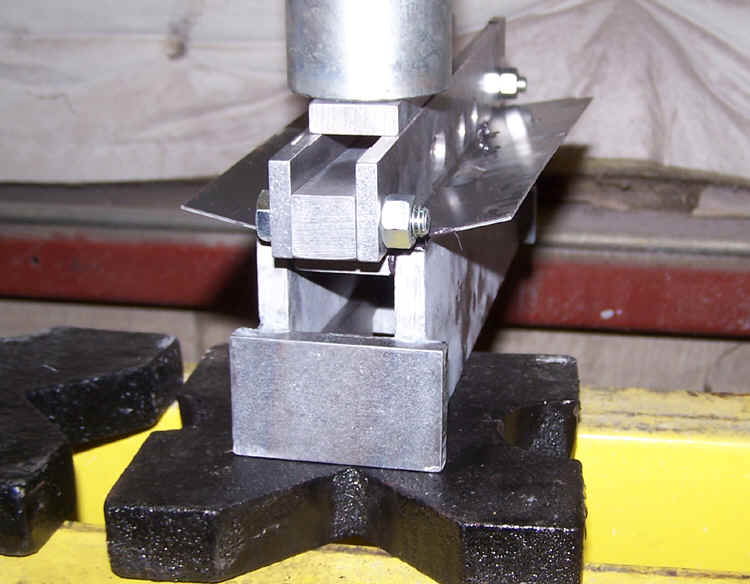
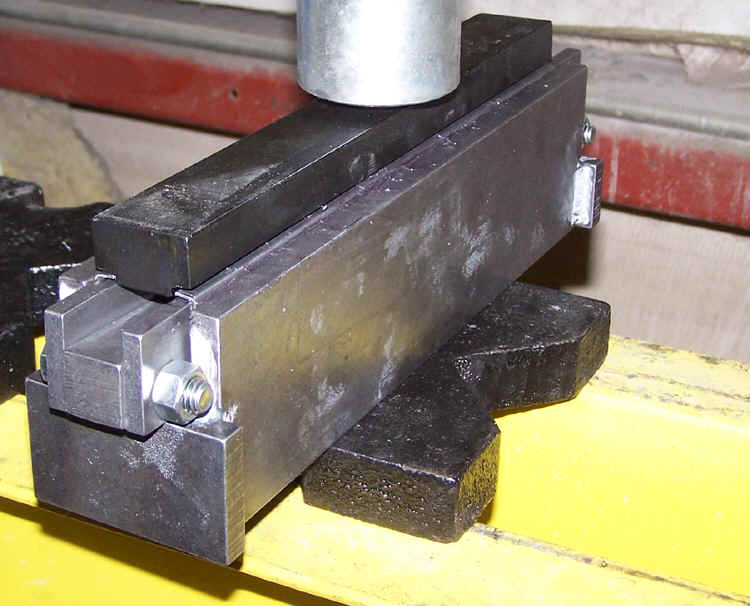
Place the jig base in the shop press and be sure to put the center part of the jig with the flat in the correct way.
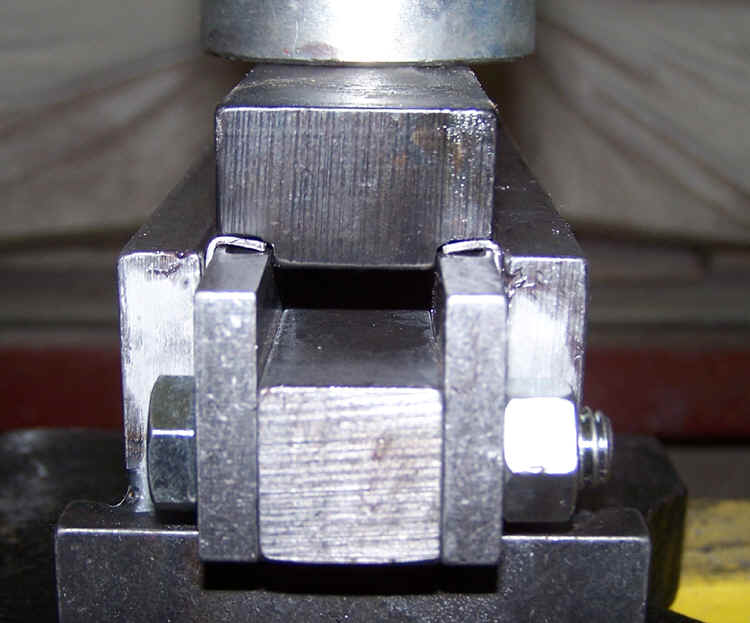
I always start at the back of the flat when bending. With the new setup there will be a piece of steel that fits between the two ridges in the top angle plates.
DO NOT TRY AND BEND THE FLAT BY PRESSING ON THE ANGLE PLATES THAT WERE MADE FOR THE TOP RAIL STEP WITHOUT THE 3/8" THICK PIECE OF STEEL!!!!
When starting to bend the flat move from the back, center then to the front just bending the flat a little at a time. Too much at once can cause creases.
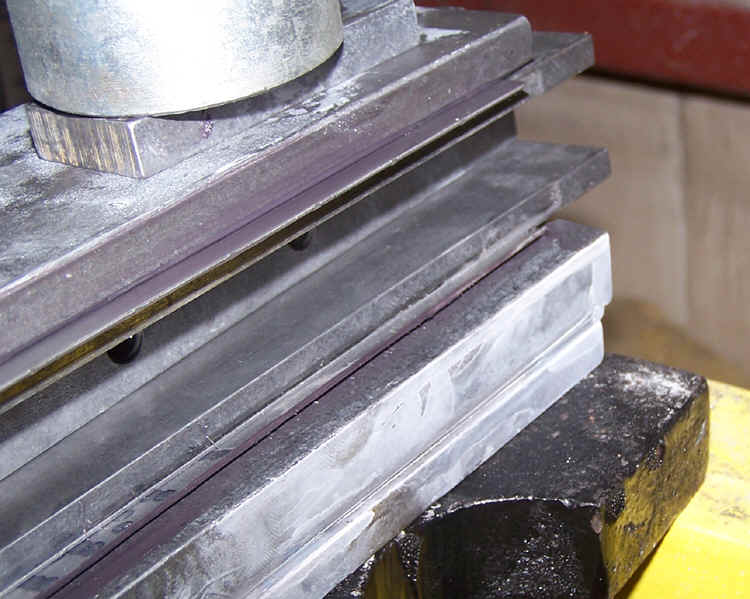
Below you can see that the rear of the flat has barely been bent and I'm moving to the center to do the next part of the bend.
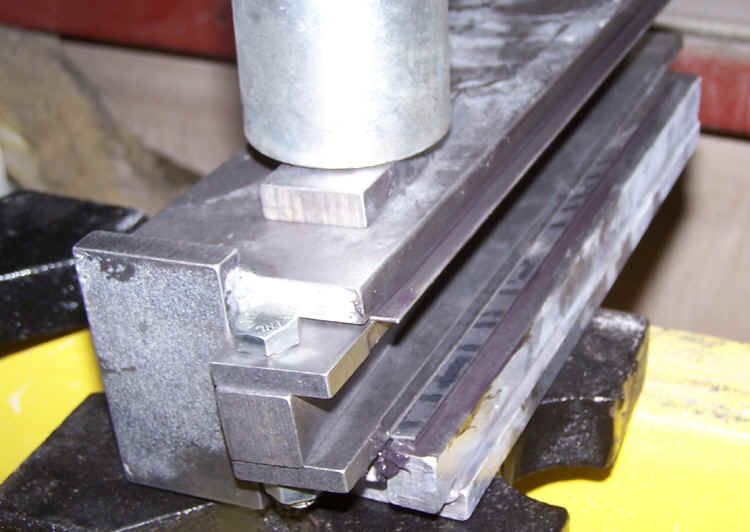
Now I moved it to the front and made it bend a little bit more than the center. Work back and forth doing this a couple of times before putting the block in the center of the jig and pressing it in the rest of the wey.
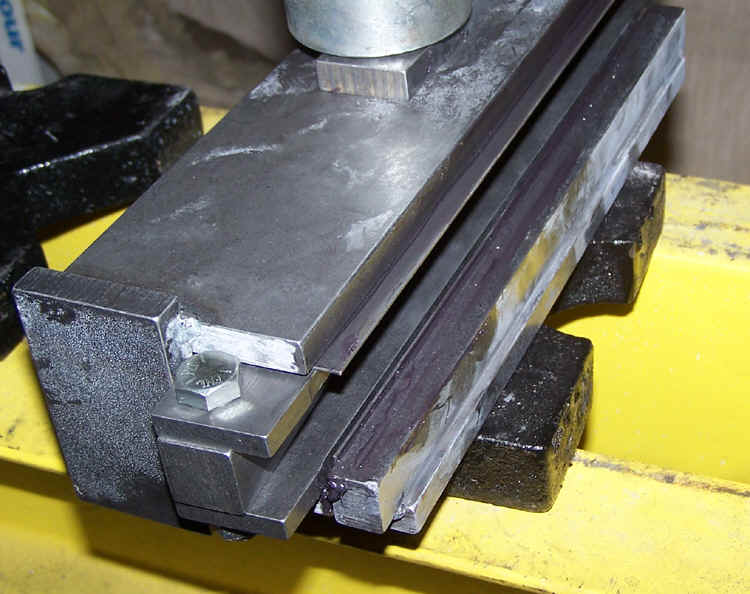
Once the lower bend is made just press it down until it stops.
DON'T PUT EXCESSIVE PRESSURE ON THE ANGLE PLATES WITH THE STEEL BLOCK OR IT WILL DAMAGE THE PLATES.
Get the top rail jig ready by greasing up the edge or just put the grease on the flat.
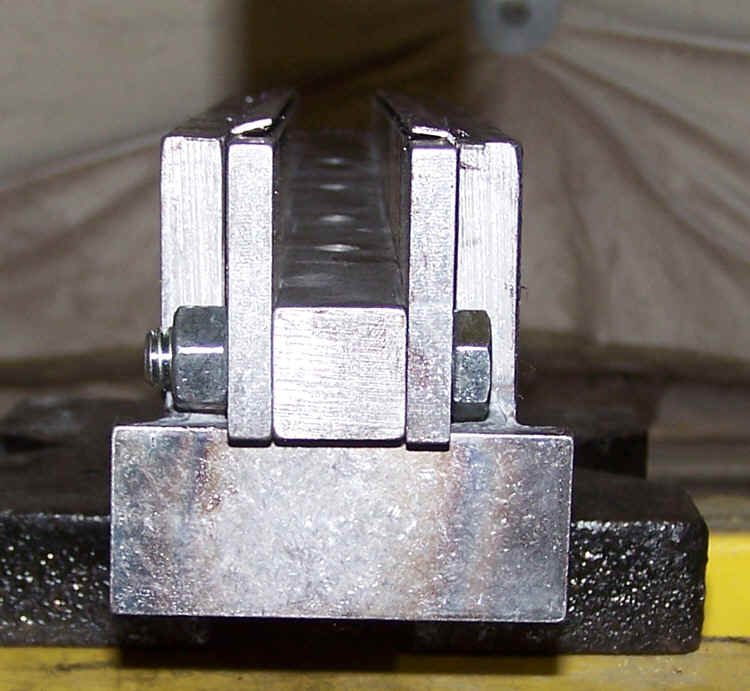
Before bending the top rail over the support plates will need to be moved so they don't contact the edge of the jig. If they touch then all of the clearance for bending the flat will be taken away and it will be almost impossible to bend the top rail over. The next two pictures show the support plate interfering and the plate in the correct position for bending the top rail. Once the top rail is bent then they can be put back into place. Don't try to leave them out and put them in after bending the top rail unless you want to take the flat out then put it back in again.

There isn't a whole lot of room to work with, but moving these supports has to be done.

Use the 3/8" block of steel when pressing down on the jig to bend the top rails. The pressure on the jig here may help keep the dimensions of the lower part of the receiver closer to 1.25" so keep it closer to where the bottom bend of the receiver is at. Go from the back, middle then to the front just like bending the main bend. It may pop going into place, but if there is excessive resistance be sure to check the support plates to make sure they moved like the picture above.
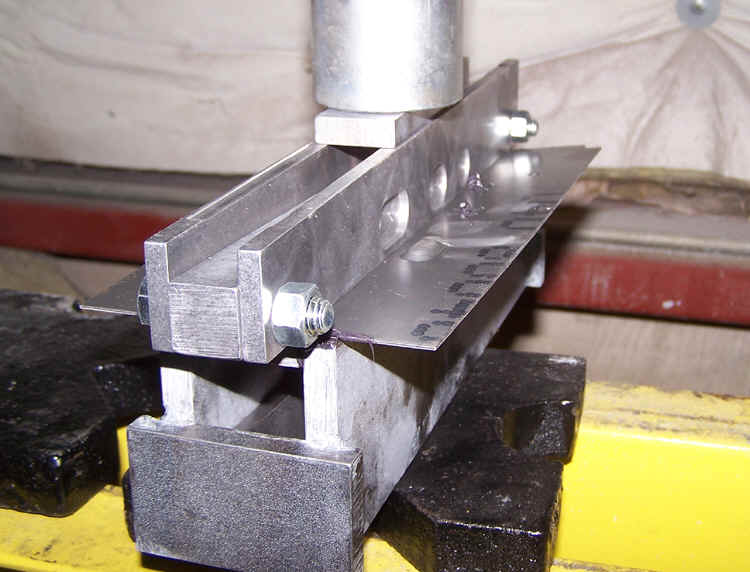
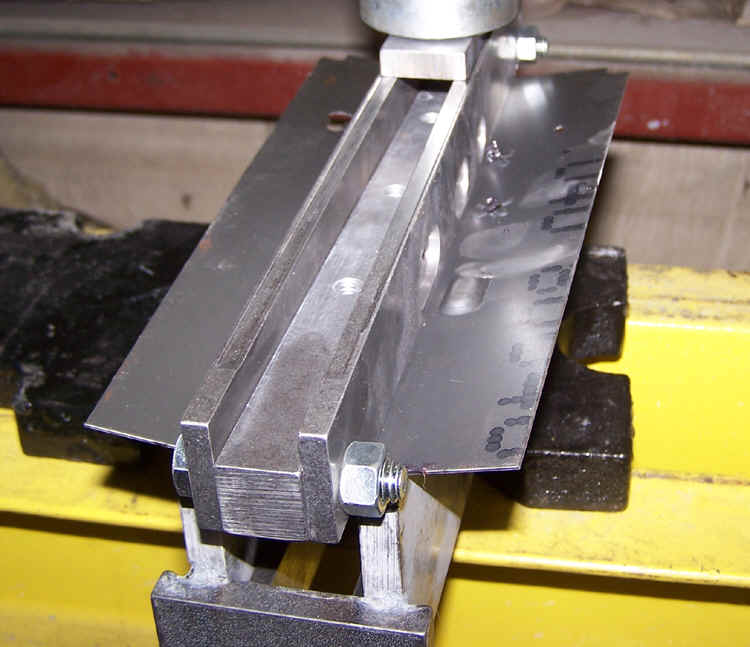
This is where I flipped the main jig over to bend the other top rail. The important part about this picture is that it shows how the support plate is moved away from the wall of the jig base.

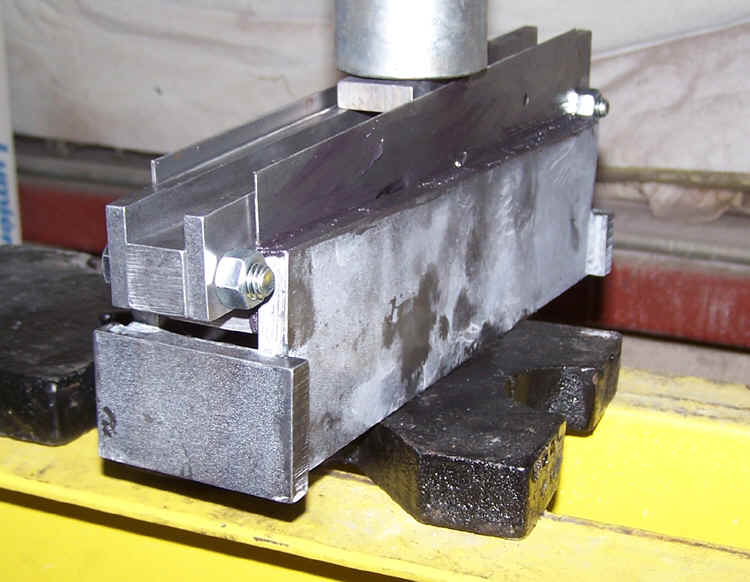
Once you get the tops bent over they should like like the picture below. There is no need to try and get them down much further than this before putting the die on for the step. Make sure the angle supports are back in place before trying to press the bar down to do the step.
There is a front and back to the step die. The rear of the die is pictured and you can see the basic area where the bolt carrier would be cut out. This of course goes towards the back of the receiver. Double check this when putting it on and don't mess up because you are in a hurry.

The main amount of pressure will be needed in the center part of the length of the flat. The front of the flat doesn't need a step, but I've made it to where the die will make an over bend. The back of the jig is the same way. Align the die with the front of the receiver. The die is machined so it will just fit between the two angle plates so keeping the die in the same place can be done with relative ease. This way you can look at how well it's making the step. Don't get all crazy and destroy the jig by putting too much pressure on it.
Below you can see the over bend on the front of the receiver. This helps keep it at 90 degrees or even a little under.

Now it's really starting to look like something. The step is done and the top rails are bent down so you don't have to worry about having to hammer anything.
To take the center die of the jig out of the base I use a plastic dead blow hammer to keep from damaging the center die.
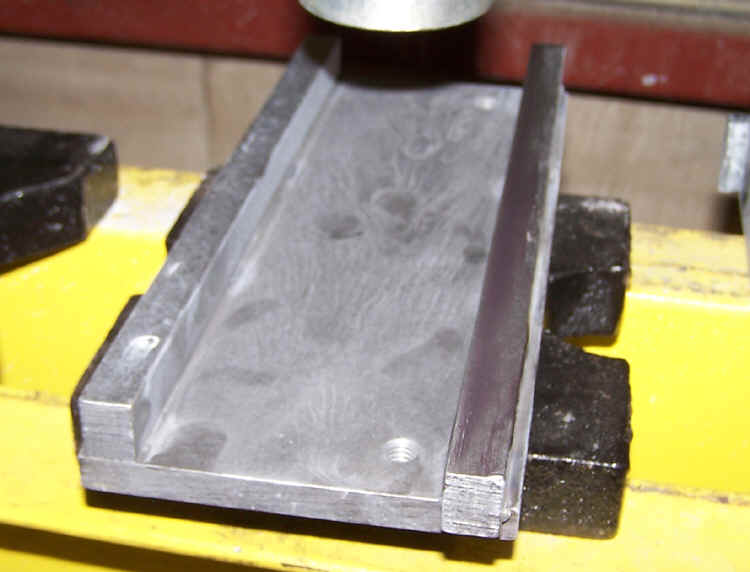
This is just a close-up picture of the top rails after being bent.
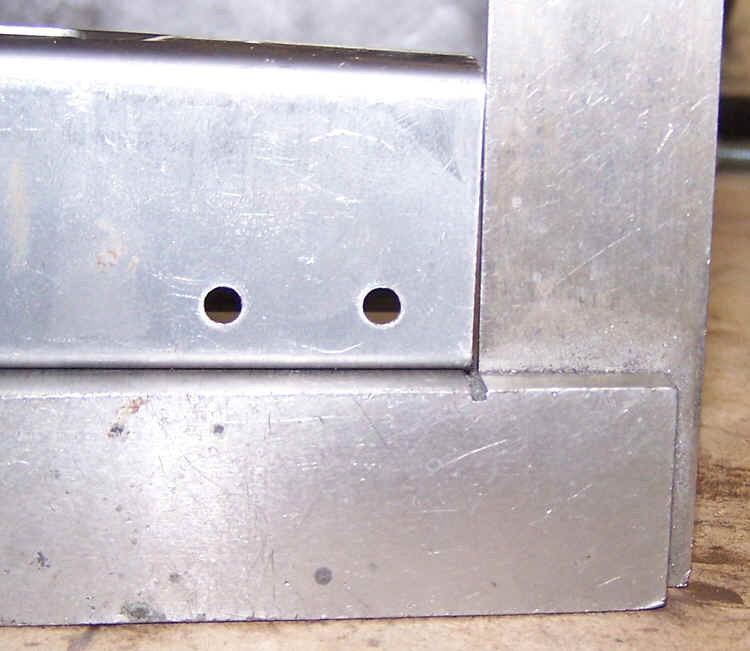
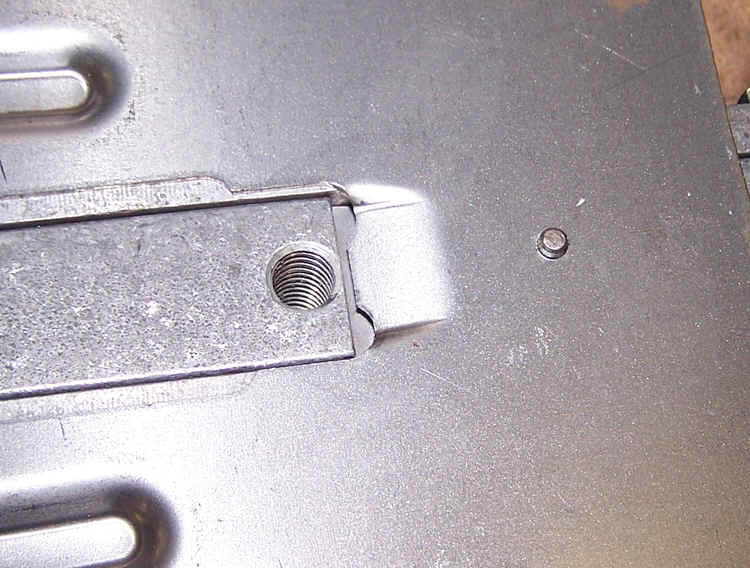
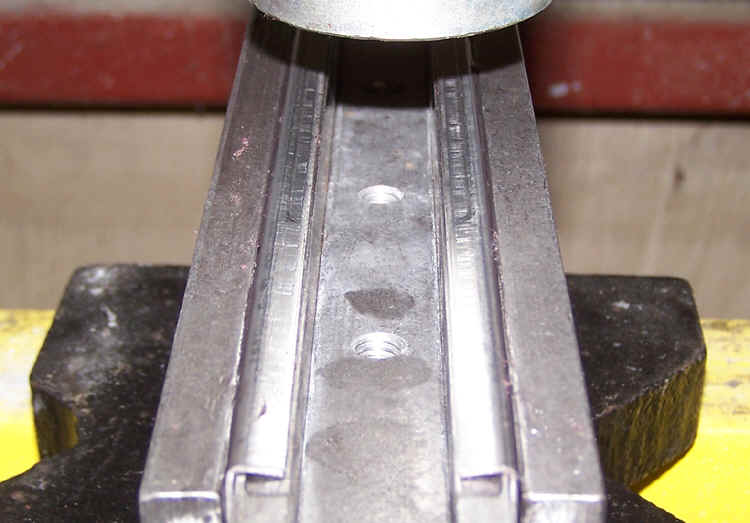
The dreaded distorted trigger hole.... Well not really since you just hammer over the small part of it on my flats then ream it out after to 7mm. The hole will be completely round with a full thickness of metal to support the bottom of the trigger pin. If this wasn't one of my flats with the hole that needed to be reamed then there wouldn't be a completely round hole to support the trigger pin.

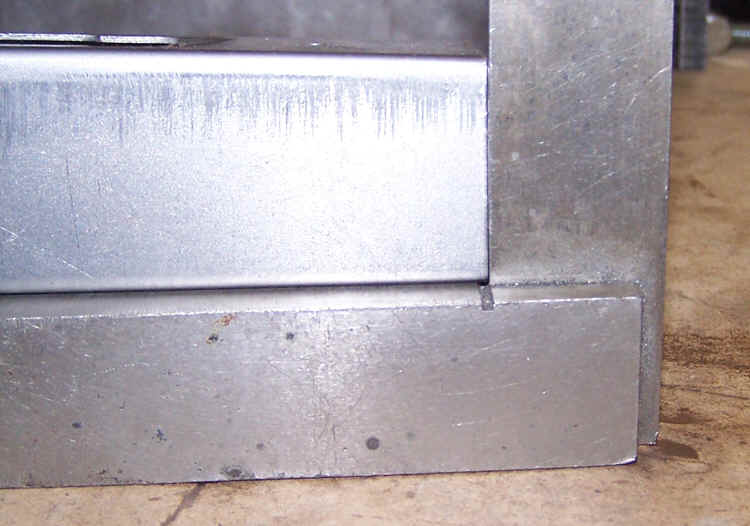
In the next picture I have hammered the bottom edge of the trigger pin hole, but that's not the best part of this picture. Look at the bottom of the receiver.... it's perfectly flat!
Look at the bends on the front of the lower part of the receiver. The new configuration of the jig makes these the best bends you can find on any of the flat bending jigs on the market.
This picture also shows removing the center bar so the angle plates can be removed.

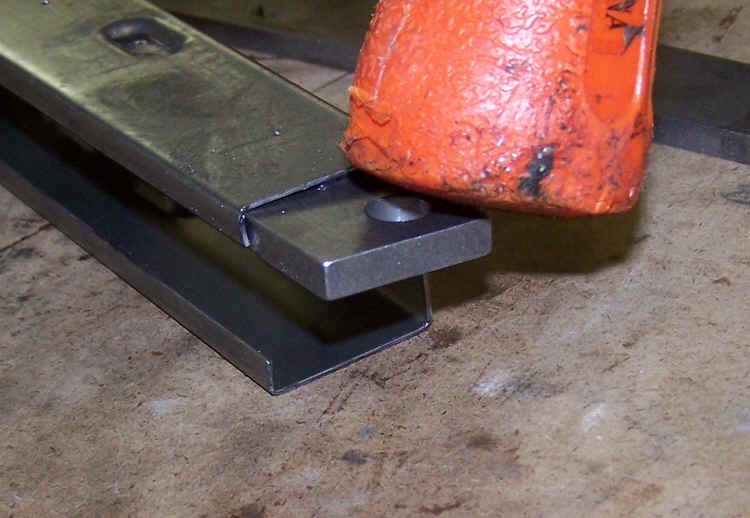
With the step put in the top rails the angle plates will need a little force to get them out of the receiver. I use the awesome orange dead blow hammer to hit the bottom edge of the angle plate to break it loose from the receiver.
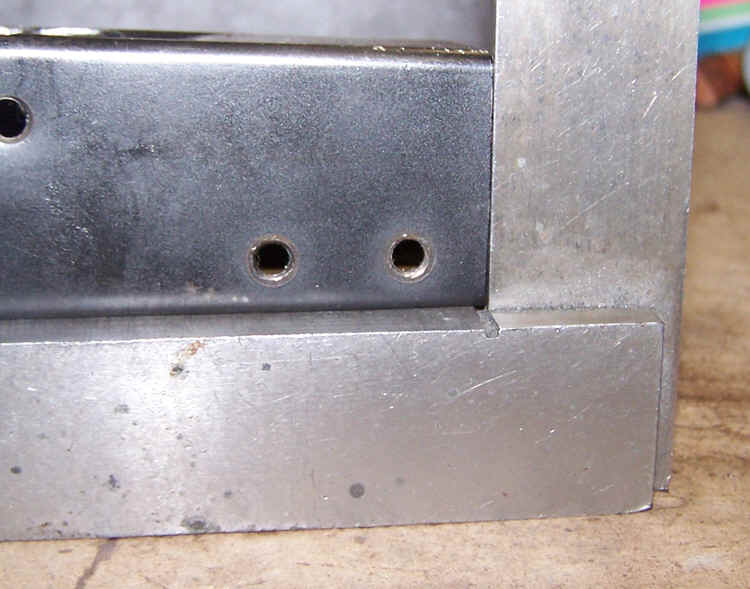
Here you can see the rear of the receiver after being bent. You can see how flat the bottom of the receiver is on the inside as well as how sharp the bends are.
The following three pictures aren't really a function of bending the flats, but more of a result of how the flats were designed. The top rail and front of the receiver should be at a 90 degree angle once bent. The first picture is the receiver that has been bent on the jig in the pictures above from one of my flats. The second picture is of a Tapco flat with the wrong angle. The third picture is from a demilled Hungarian AMMS showing the 90 degree angle on the front of the receiver.